Once your Snapshot Screen is connected to WiFi and paired with your Altimeter Cloud account, every flight you record can be uploaded to the cloud for long-term storage and sharing. This is a one-off setup per screen — after that, exporting is a single tap.
What gets uploaded: each flight’s full set of statistics, plus three 300-point charts — altitude, apogee zoom, and motor burn. The view on altimetercloud.com matches what the screen shows. You can view all the backed up data from the My Devices page on the Altimeter Cloud once paired.
Open the WiFi & Export menu
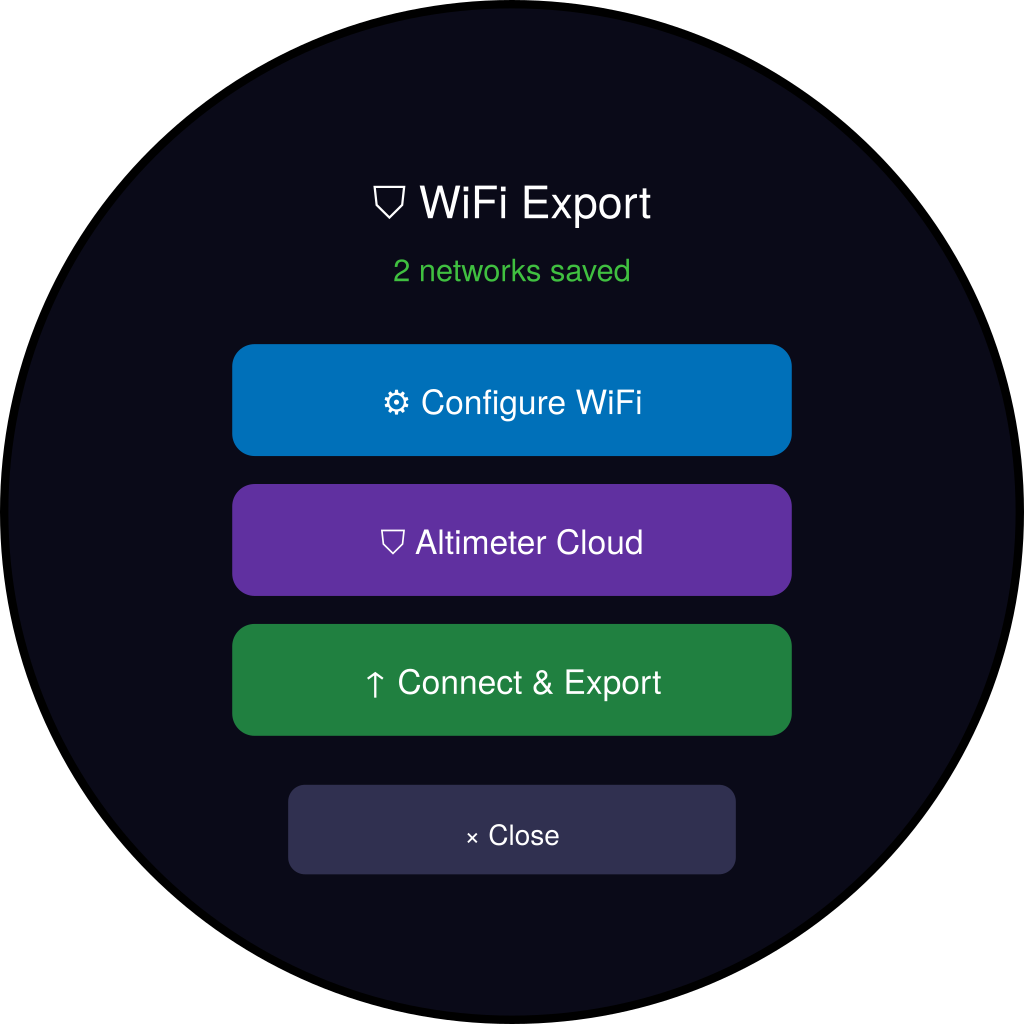
On the history tab, tap the blue ↑ Export Flights button at the top. The WiFi & Export menu appears with three buttons in the order you’ll normally use them.
The green line at the top shows how many WiFi networks are saved. If it says 0 networks saved, start with Configure WiFi below.
Add a WiFi network
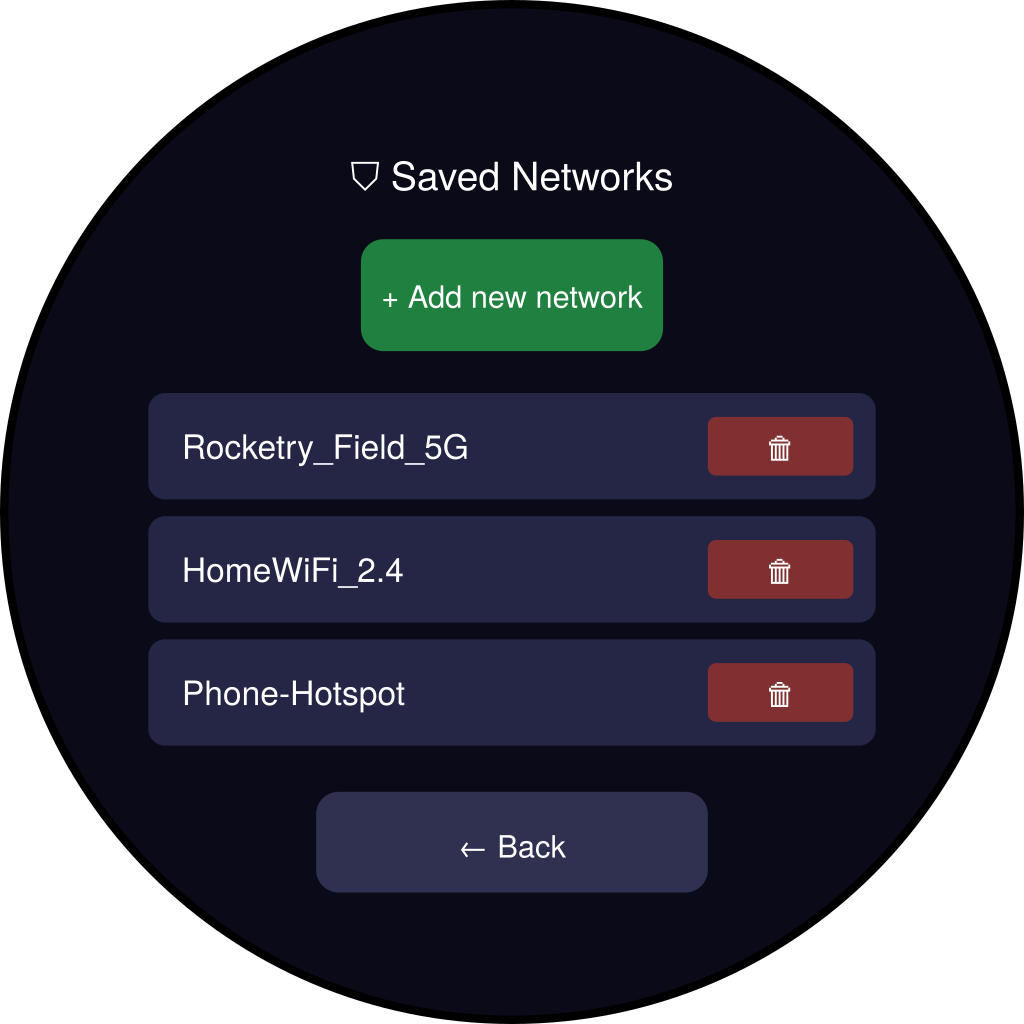
Tap Configure WiFi. You’ll see any networks already saved, with a green + Add new network button at the top. The screen holds up to five networks — it connects automatically to any one it can see, so you can add your home WiFi and your club field and it’ll just work in both places.
Tap + Add new network. The screen scans for nearby WiFi and lists them by signal strength. Tap the one you want.
Enter the password
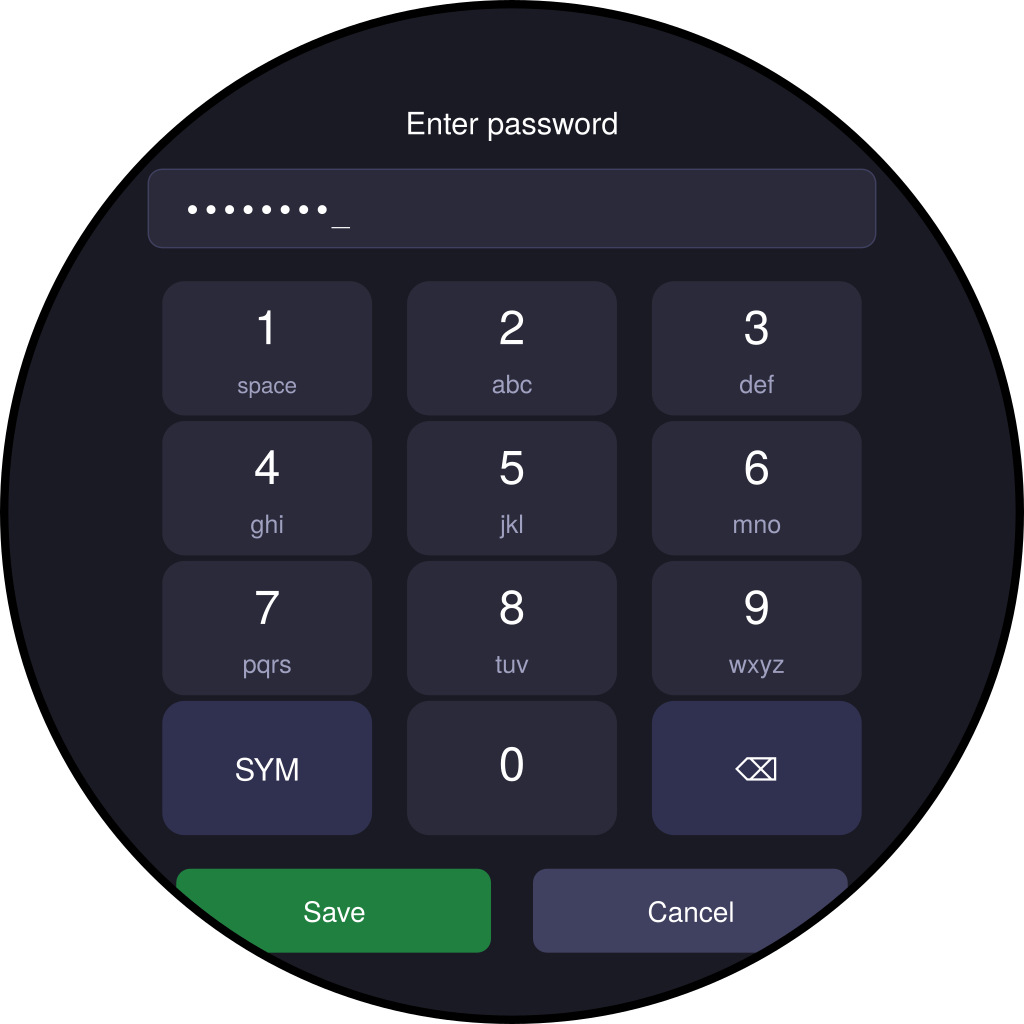
The keypad works like an old phone. Tap a number key repeatedly to cycle through its digit and its letters — tap 2 once for 2, twice for a, three times for b, four times for c. Pause for a moment to lock the character in, then move on to the next.
- SYM — opens the symbols pad for punctuation.
- ⌫ — backspace.
- Save (green) — commits the password and starts connecting.
- Cancel — goes back without saving.
WiFi passwords are case-sensitive. Each letter key cycles through lower-case letters first; there’s no upper-case toggle at the moment, so networks with mixed-case passwords will need to be typed carefully.
Pair with your Altimeter Cloud account
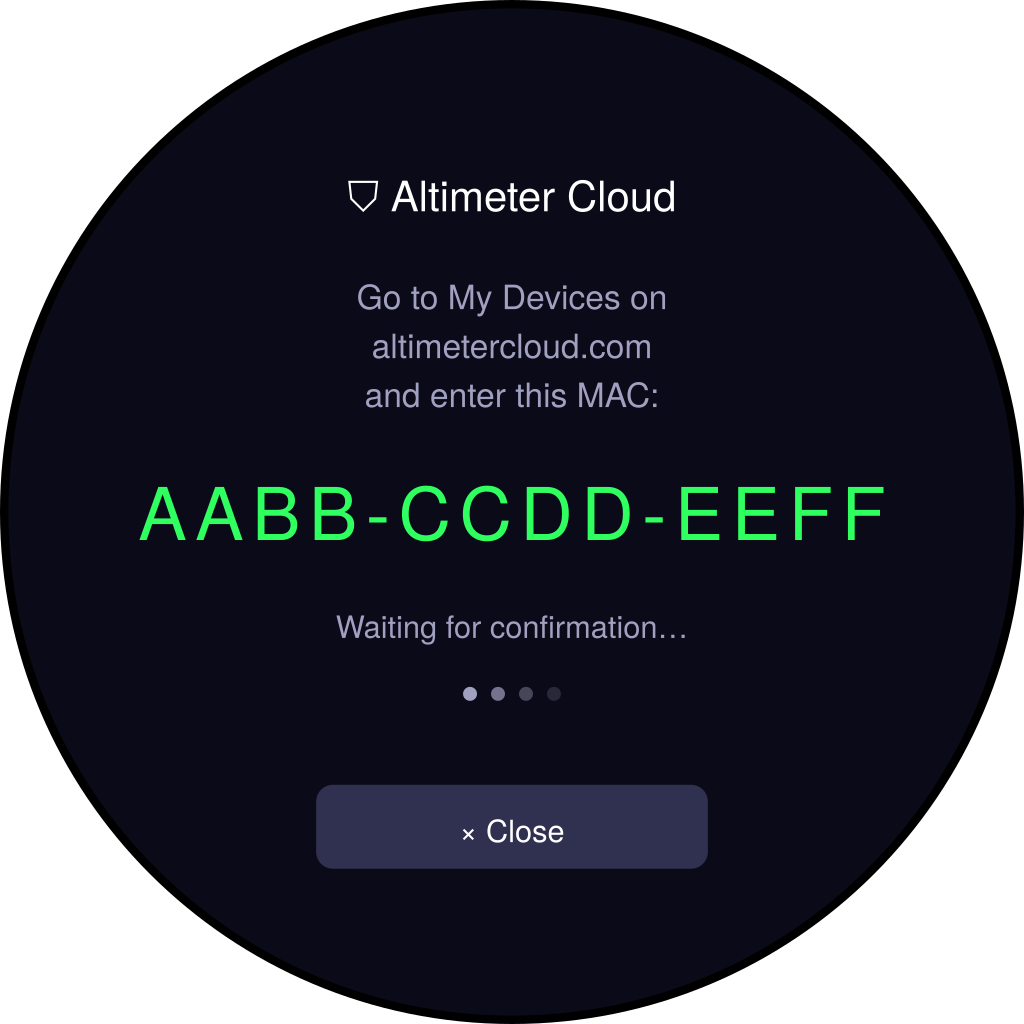
Back on the WiFi & Export menu, tap Altimeter Cloud. The screen connects to WiFi and shows a MAC address in green, in the form AABB-CCDD-EEFF.
On a computer or phone:
- Sign in at altimetercloud.com.
- Go to My Devices.
- Enter the MAC exactly as it appears on the screen and select Screen from the dropdown option.
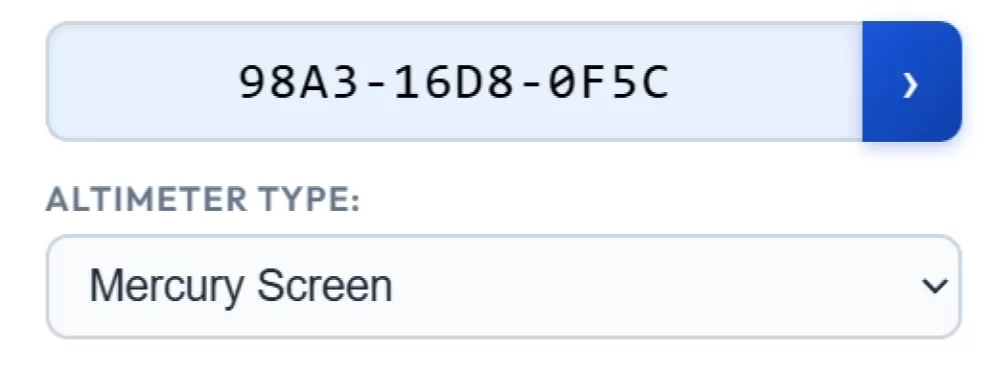
Once the website confirms the pairing, tap Confirm on the screen. You only need to do this once per Snapshot Screen for each account you want to be able to view the screens data on.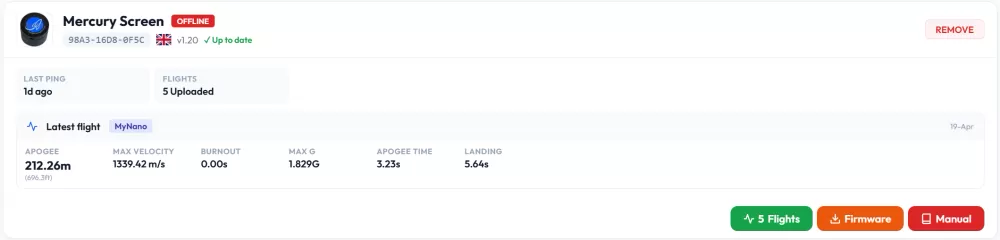
Export your flights
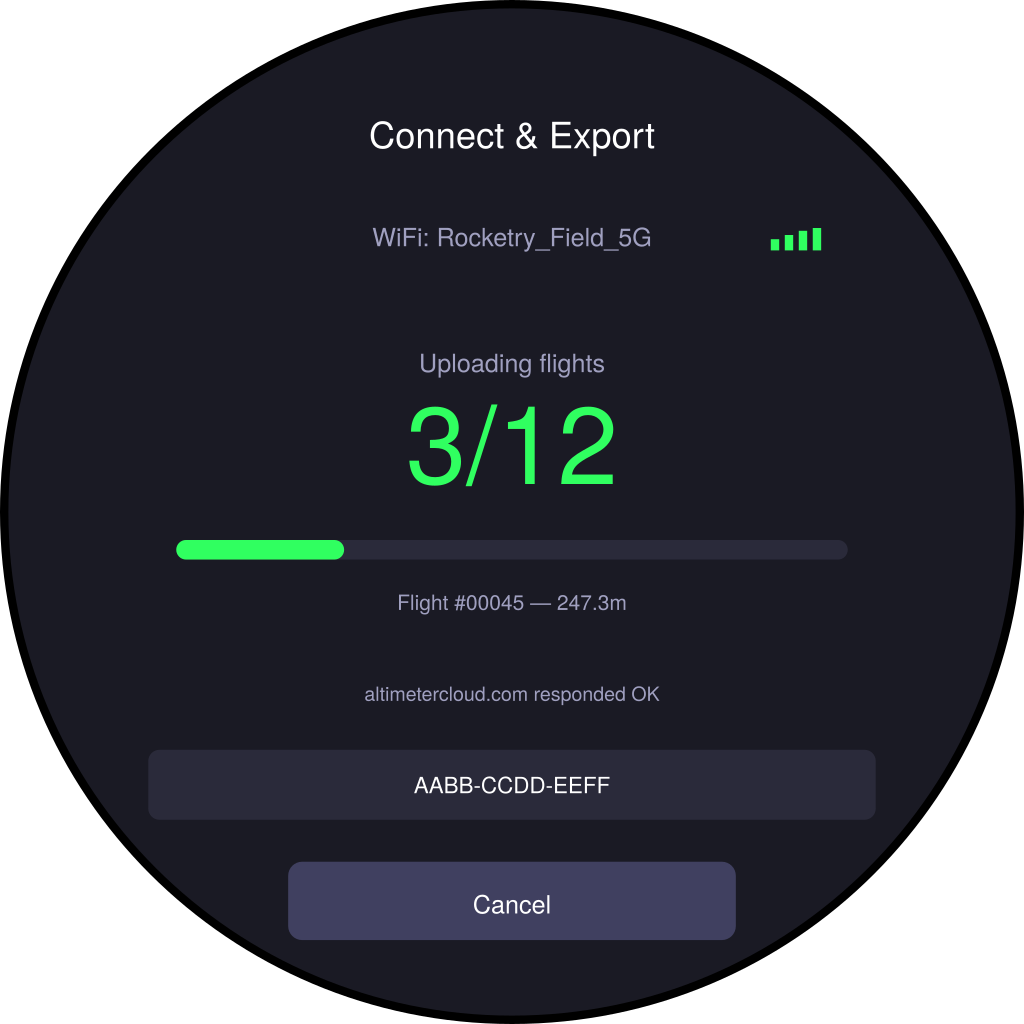
With WiFi set up and Altimeter Cloud paired, tap Connect & Export. The screen connects to WiFi and starts uploading.
The big green number shows how many flights have been sent out of the total still to upload. Flights that have already been uploaded are skipped automatically — there’s no need to worry about duplicates.
When there’s nothing left to send, the screen will tell you so:
All flights already backed up to Altimeter Cloud.
Add your screen to your account to view them.
Worth knowing: Try not to power the screen off mid-upload. If the connection drops, any flights that weren’t fully sent will just re-try on the next export — nothing is lost.